Updating Google Sheets With Gender Using Zapier
In this guide we'll take a step-by-step approach to set up an integration between Genderize.io and Google Sheets adding a gender prediciton and an optional prediction certainty to each row. When we're done, we'll have a Sheet that will automatically update by adding a gender prediction every time a row is added or updated.
To set up the integration, we'll make use of our official Zapier integration.
-
1. Initial Setup
The first step before starting is to make sure you're set up with the tools we need.
-
Genderize: You don't need to have an account for Genderize.io. If you don't, you will be limited by our daily limit of 100 names. If you need to process more names, you can sign up for an account.
-
Google Sheets: Make sure you have your Google Sheet ready. Reading this article, we'll assume you have that covered.
-
Zapier: You'll also need an account for Zapier. Zapier will be the integration engine, moving data from Genderize.io to your Sheet whenever it updates.
-
-
2. Preparing the Sheet
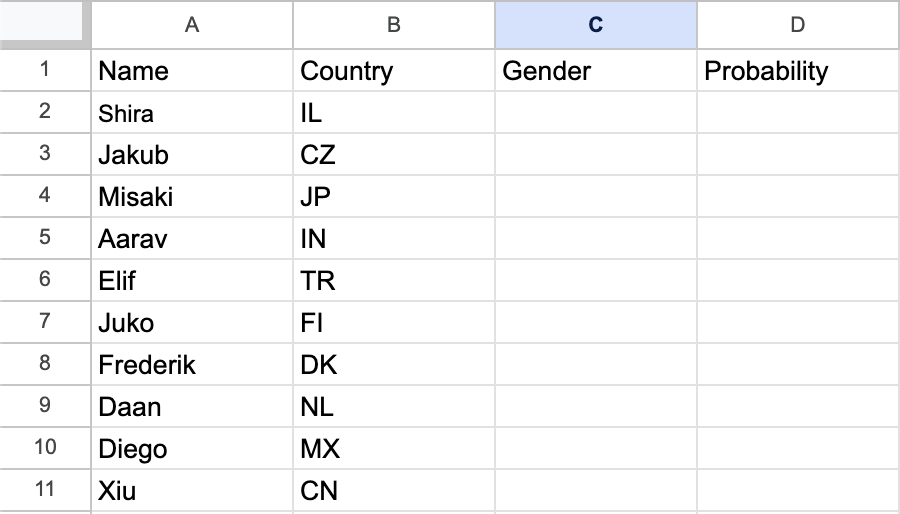
To prepare your Sheet, you need at least a column containing first or full names and an empty column for gender classifications. Optionally you can add a column for the gender classification probability.
If you want to improve the accuracy of the predictions you can add a column containing country codes in ISO 3166, enabling classification within that country scope.
The rest of this guide assumes a Sheet like the following - you can adjust it to your own setup.
-
3. Creating a New Zap
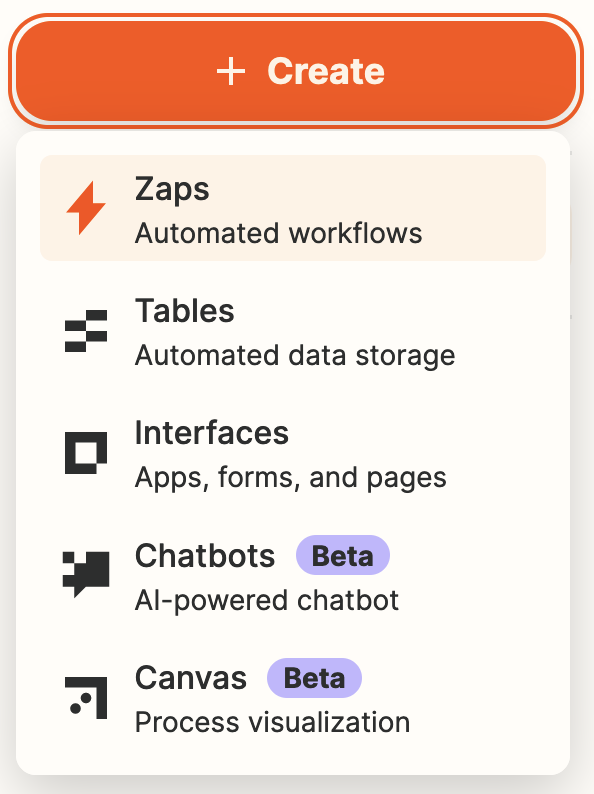
"Zaps" are Zapiers term for an automated workflow between tools and we'll start by creating a new one. From the dashboard of your Zapier account find the orange "Create" button on the panel on the left, click it and choose "Zaps"
With the new Zap created, you'll see a visual editor that will let us set up the integration. To begin with you can choose a proper name for your integration in the top panel that now says "Untitled Zap".
-
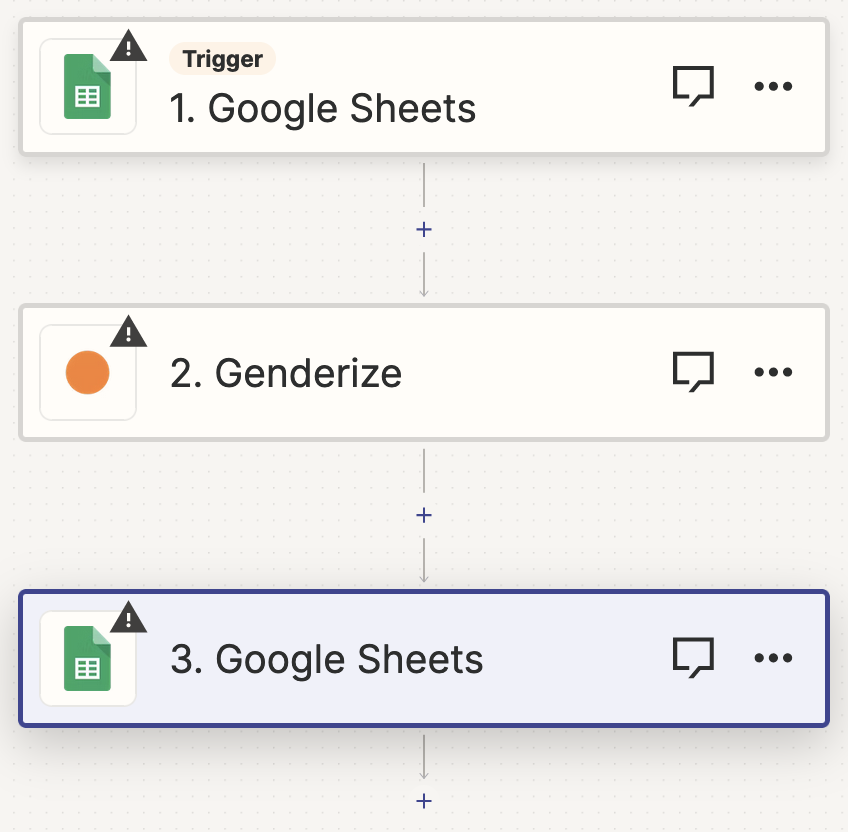
4. Creating the Workflow
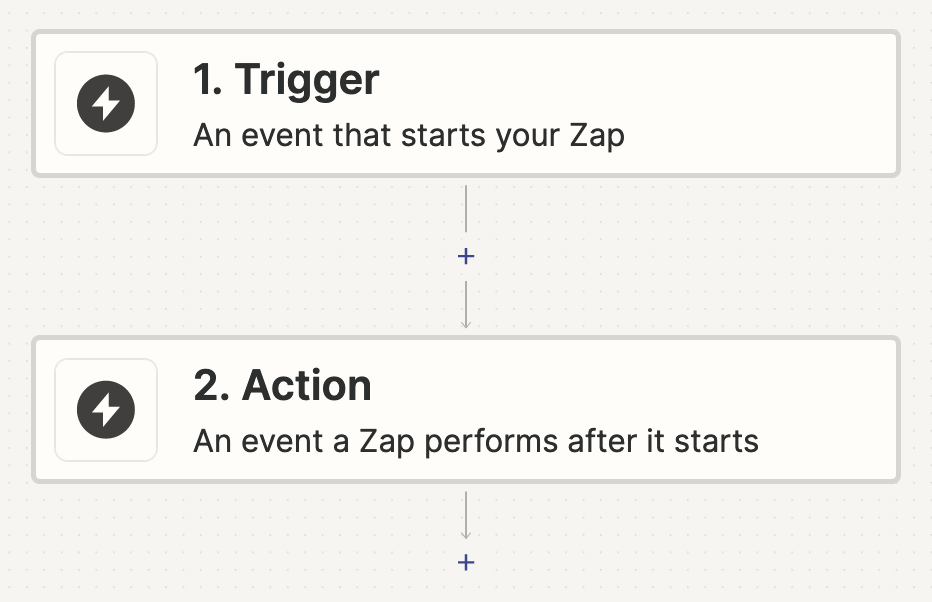
In the middle of the editor, you'll see a visual representation of the initial workflow, currently made up by two steps - a trigger and an action.
Clicking any of them will open up a modal that let's you search and pick an integration for the step.
Adding the Google Sheets trigger
Click the step saying "1. Trigger". This will open up the modal with a search input. Search Google Sheets and select it.
Adding the Genderize action
Next, click the step saying "2. Action". The integration modal will open again and this time we'll search for "Genderize" and select that.
Adding the Google Sheets update action
With these two steps in place, click the small "+" sign under the last step. This will create a third step. Click it to reopen the modal and select Google Sheets again.
You should now have workflow like the following.
-
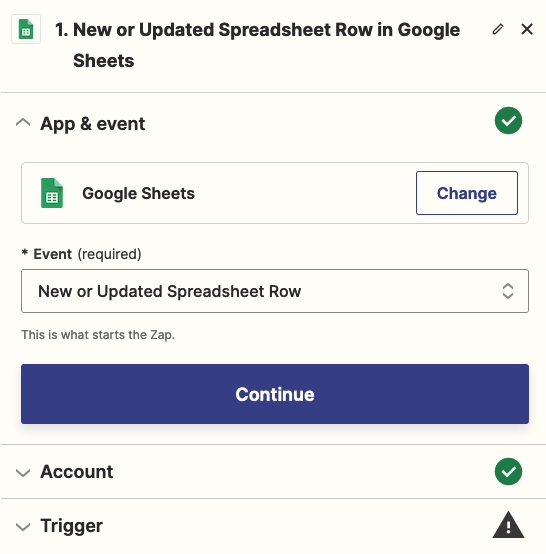
5. Configuring the Google Sheets Trigger
First click the "Event" option and choose "New or Updated Spreadsheet Row". This will tell Zapier to trigger our Zap every time a row is added or updated in our Sheet.
Proceed by clicking "Continue".
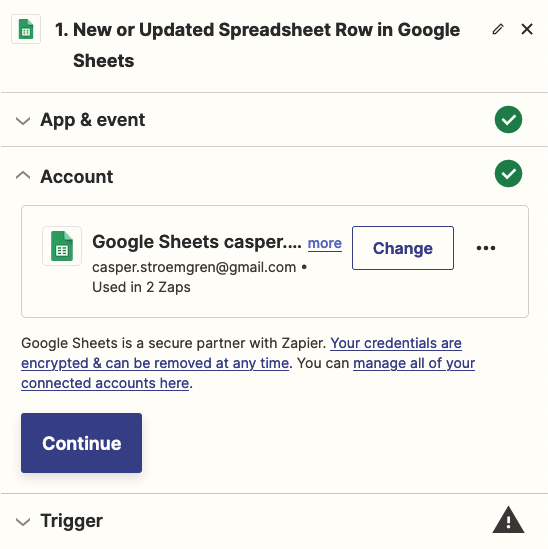
Next we need to authorise Zapier to connect to Google Sheets. Next to "Connect Goole Sheets", click "Sign in" and sign in to the Google account where your Sheet is located.
As the last part of configuring our trigger, we need to pick the Sheet to work on. Under "Spreadsheet", select the Spreadsheet you're working on.
Next, select the specific sheet in your Spreadsheet under "Worksheet".
The last option called "Trigger Column" should be left with the default "any_column", telling Zapier that we want to trigger on updates to any row.
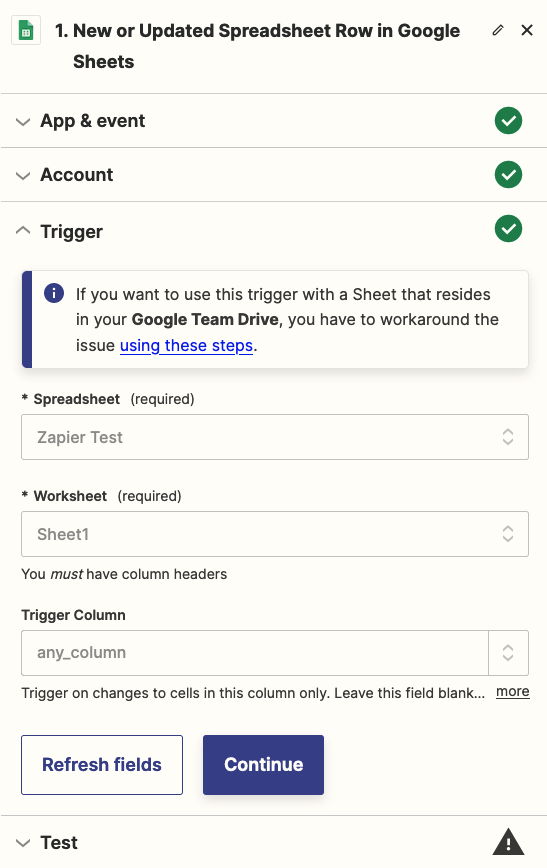
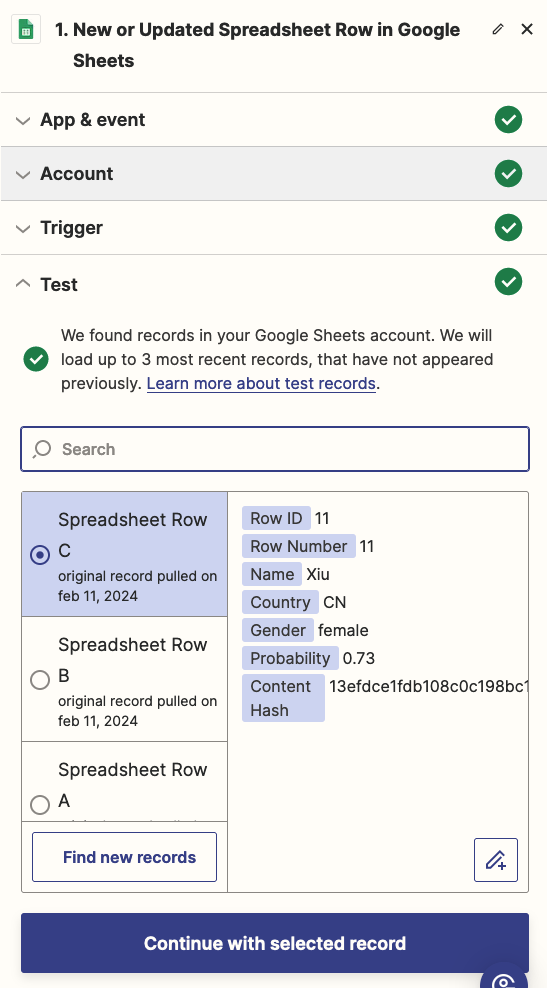
Under the test section, run the test and select a row a shown. This will be our reference row for the rest of the setup.
-
6. Configuring the Genderize Action
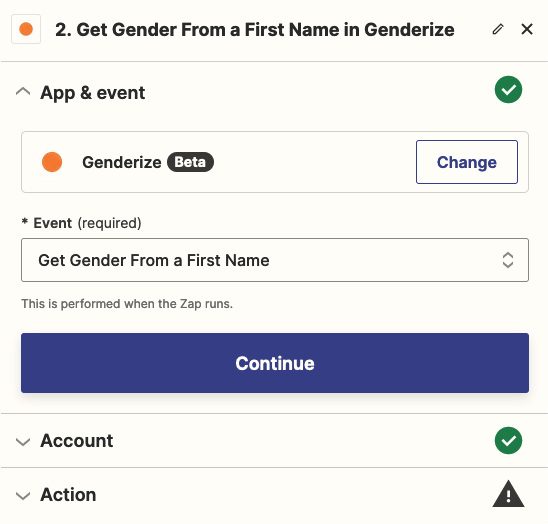
With the trigger configuration done, select our second step in the editor called "2. Get Gender From a First Name in Genderize.
This will switch the configuration panel on the right to the Genderize configuration.
Click the "Event" option and select "Get Gender From a First Name. Proceed by clicking "Continue".
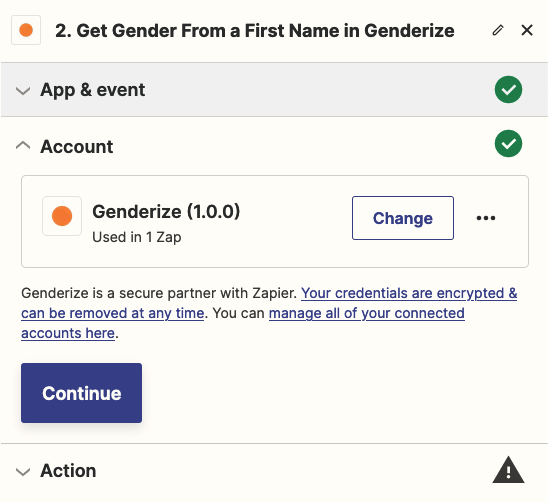
Under "Account" you have the option of authorising yourself to Genderize.
If you don't have an account with Genderize, you can leave this setting. You'll be limited by the free daily limit of processing 100 names.
If you do have an account, you should check your Genderize account and grap the API key. Paste it into input when signing in to Genderize.
You can also sign up for a new account.
Next we'll set up the gender classification action. Genderize needs to know which column to grab a name from and optionally which column to grab a country ID from.
In the "First Name" column, select "1. Name" in case you're using our example Sheet or find the column containing names in your own Sheet.
In the "Country" column, you can choose to select a column containing country ID's in ISO 3166-1 format, this can raise the accuracy of the predictions. If you don't have countries available you can leave it blank.
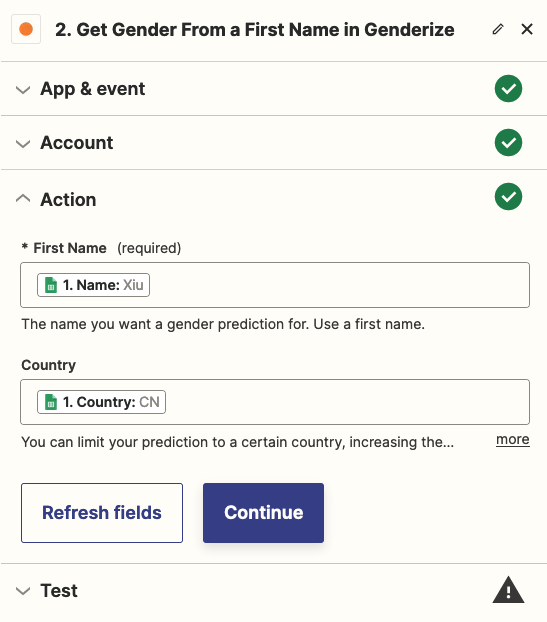
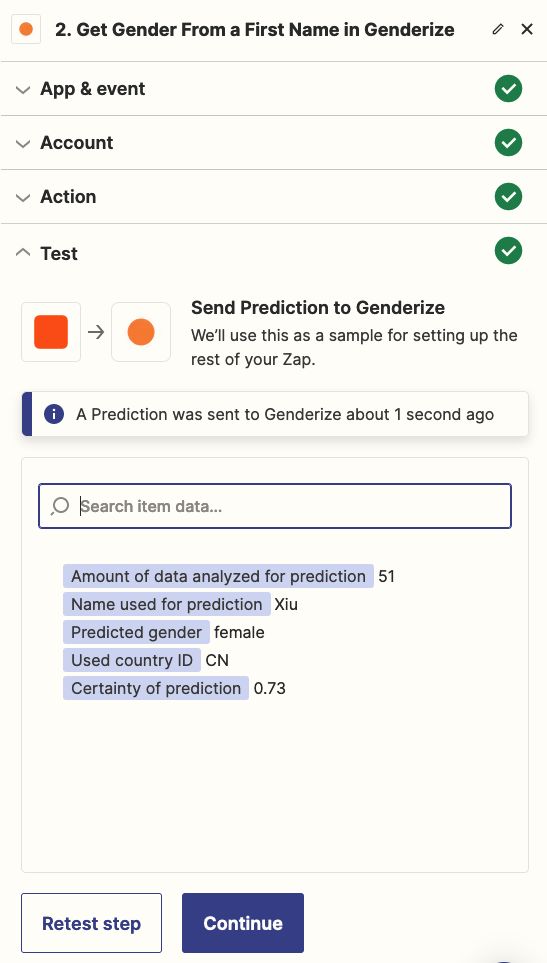
In the "Test" section, click the test button and check that you're getting a prediction result from Genderize
-
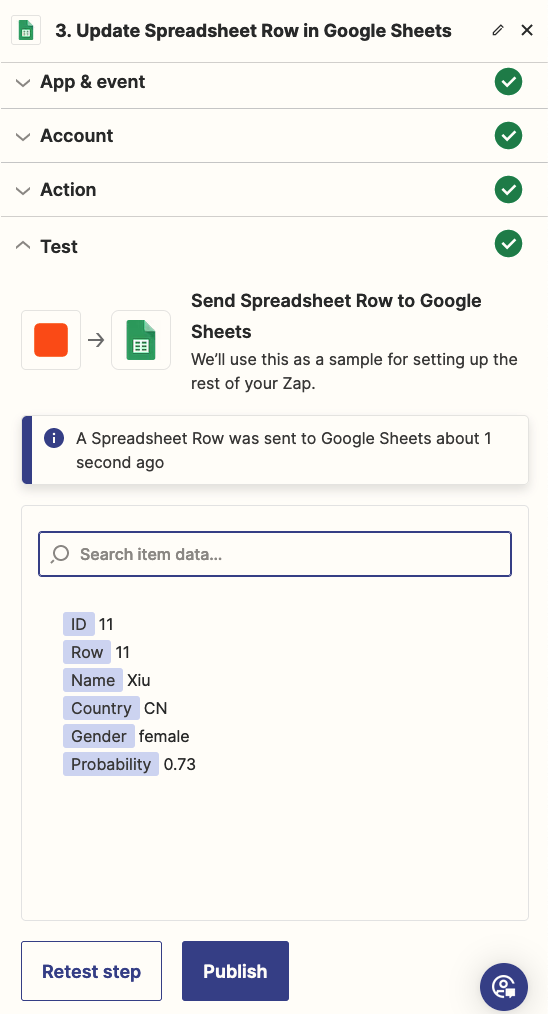
7. Configuring the Google Sheets Update Action
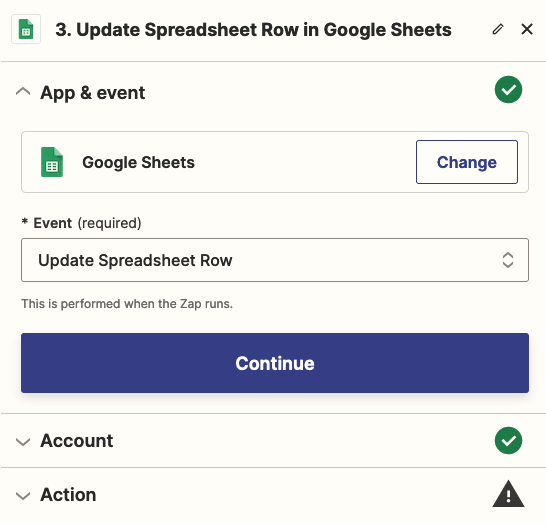
On to the last part of the configuration. Make sure to select the third step in our workflow called "3. Update Spreadsheet Row in Google Sheets".
With the configuration panel open on the right, the first task is to select "Update Spreadsheet Row" for the event option. This will ask our workflow to update rows in Sheets with the data fetched from Genderize
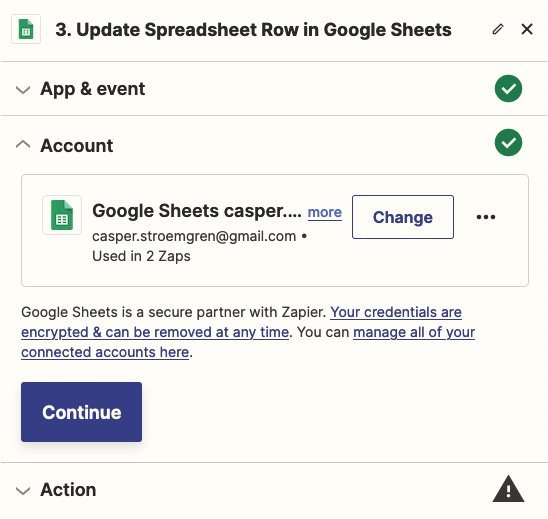
In the account step you should already be signed in to Google Sheets from the first configuration step.
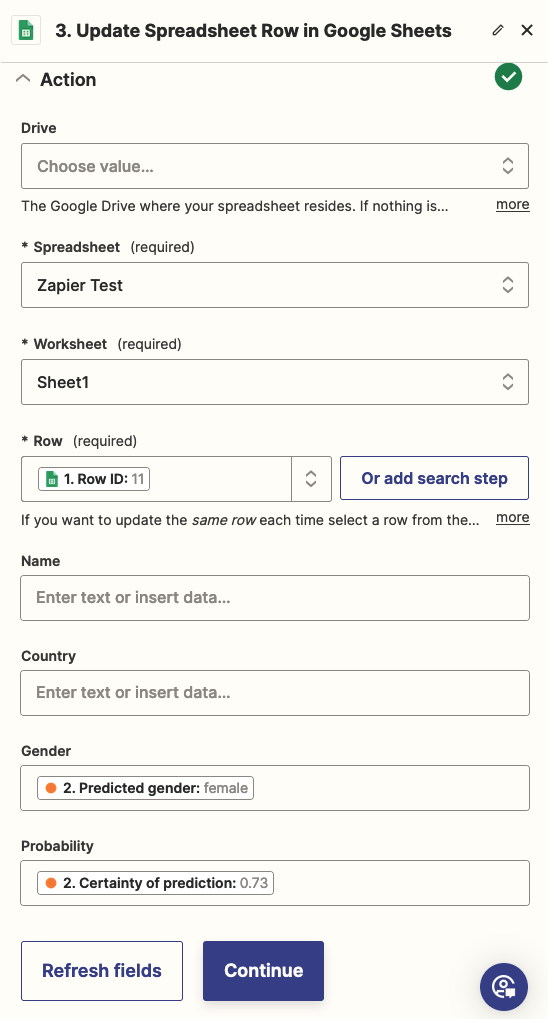
In the third step you should start with configuring "Drive", "Spreadsheet" and "Worksheet" to the specific Sheet that we're working with.
For the "Row" option you need to select "Row ID" which will tell Zapier to update the row that was initially triggering the workflow by being added or changed
Lastly you need to configure "Gender" and "Probability" with "Predicted gender" and "Certainty of prediction".
In the last step you have the option to test the whole workflow. Once you're done, click "Publish" and the workflow will be online. You'll be prompted to update the already existing data which you can choose to do.
-
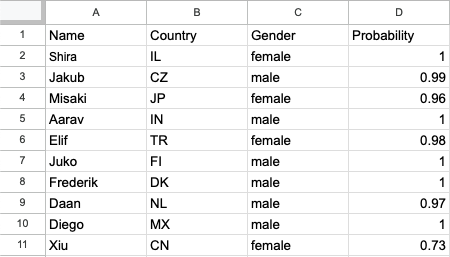
8. The Finished Workflow
With everything set up, you now have a spreadsheet with a "Gender" and a "Probability" column that will automatically update every time a change is made.